Contact Us

Use the form on the right to contact us.

You can edit the text in this area, and change where the contact form on the right submits to, by entering edit mode using the modes on the bottom right. 

367 North Main Street
Milford Charter Township, MI, 48381

248.684.1373

Acorn Farm opened its doors in downtown Millford in 2008. Since then, we’ve had the pleasure of meeting the most kind, interesting, generous, and downright fun people in the store every single day. Our staff is made up of former customers who became a part of our family so much that we just had to hire them! At Acorn Farm our goal is to not only provide you with high quality goods for your kitchen and home, but to stir up your imagination in the kitchen and around the home. We aim to make every trip to Acorn Farm a pleasant one, and that you’ll always leave encouraged, inspired, and ready to try something new.  

RECIPE ARCHIVE IV

Filtering by Tag: flour

Grilled Flatbread

Lia Soneson

Grilled-Flatbread_V2_01a.jpg

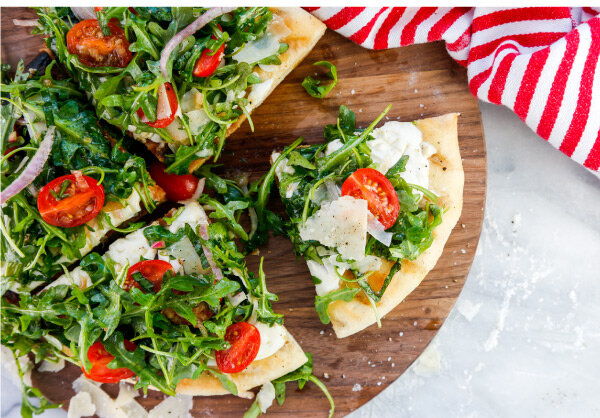
Meat and veggies aren't the only thing to make on the grill -- try something new with our grilled flatbread! Puffy, with a delightful crackle on the exterior, grilled flatbread is different from a traditional pizza crust, but no less delicious. For this recipe, we’ve topped our flatbread with melty mozzarella, spicy garlic, and piled it high with fresh-from-the-garden salad.

Grilled Flatbread - with an Arugula, Tomato, & Basil Salad
Serves 2

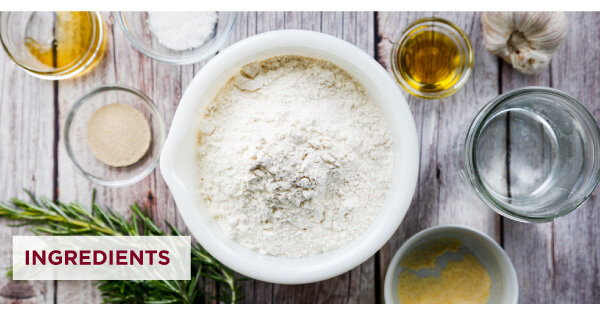
Flatbread Ingredients:
1 cup lukewarm water
1 packet instant yeast
1 teaspoon honey
1 teaspoon Kosher salt
2-1/2 cups all-purpose flour, plus more for dusting and kneading
1 tablespoon olive oil, plus 1 tbsp olive oil for brushing crust
2 cloves garlic, thinly sliced
4-6 ounces fresh mozzarella cheese, thinly sliced

Salad Topping Ingredients:
4 cups arugula, washed
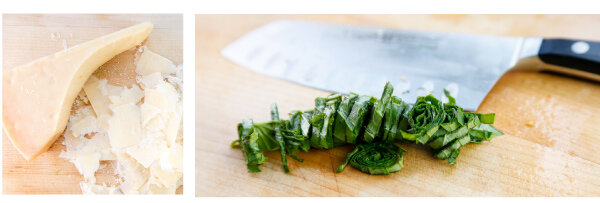
1/4 cup shaved Parmesan Reggiano
10 oz ripe cherry tomatoes, halved
1/2 small red onion, thinly sliced
6 leaves fresh basil, sliced chiffonade style

Salad Dressing Ingredients:
1 tablespoon freshly squeezed lemon juice
1/2 shallot, minced
3 tablespoons olive oil
1/2 tablespoon balsamic vinegar
1/4 teaspoon Kosher salt
1/4 teaspoon black pepper

Directions:
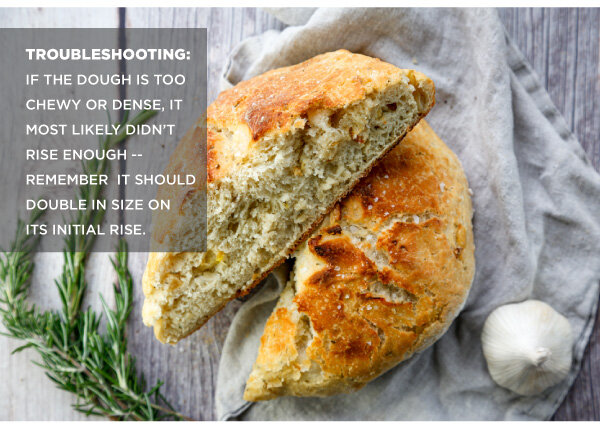
1. Prepare the dough. Add the yeast to warm water, and proof for 2 minutes (until a few bubbles begin to appear). Then add in the olive oil, honey, salt, and one cup of the flour. Mix together, and then slowly add in the remaining flour; mix until a rough dough ball is formed. Transfer the dough to a floured surface. With the heel of your hand, knead the dough, adding flour as necessary to keep it from sticking. Knead until the dough turns into a smooth ball; place in an oiled bowl. Cover the bowl with a towel and let rise at room temperature until doubled in size, about 1 hour.

2. Meanwhile, prep the salad ingredients. Wash the arugula, shave the Parmesan, halve the tomatoes, and finely slice the red onion. Chiffonade the basil by stacking individual basil leaves, rolling them all together, then thinly slice them into ribbons.

3. whisk together the salad dressing ingredients. Cover and refrigerate.

4. Once the dough has doubled in size, prepare a direct/indirect grill, with high heat on one side.

5. Divide the dough into 2 equal portions. On a floured surface, pat each piece into a circle, about 12" in diameter. Prepare 2 parchment-lined baking sheets. Brush the parchment with a little olive oil, then place the two crusts on the parchment. Brush the top of the crusts with a little more olive oil.

6.Once the grill is hot, work quickly to grill the dough. Use the parchment paper to lift the crust, turn it over onto the grill and remove the parchment from the top of the dough. Close the lid and grill the dough for 4-5 minutes until dough begins to flu and brown slightly. Then, carefully use long tongs or a large grill spatula, flip the dough and place over indirect heat.

7. Brush the grilled side of the crust with olive oil, sprinkle with the garlic and fresh mozzarella slices. Cover and grill for another 5-10 minutes, or until the cheese has melted. Watch closely and check often to make sure the flatbread doesn't burn. Remove the cheesy flatbread from the grill and get ready to top it with the salad.

8. In a large bowl, use tongs to toss the salad in the dressing until coated. Top the grilled flatbread with the salad, sprinkle with additional salt and pepper and enjoy immediately.

Roasted Garlic and Rosemary No-Knead Dutch Oven Bread

Lia Soneson

Bread. What’s not to love? A crunchy crust and soft, airy interior are just the beginning of our obsession. We love this recipe because it packs a serious flavor profile with minimal effort. It’s great for beginners, and takes less than three hours from start to a tasty finish. IN THIS ISSUE, we walk through the techniques of baking Dutch oven bread, and offer various success tips to inspire both novice and pro bakers alike!

Roasted Garlic and Rosemary No-Knead Dutch Oven Bread
Makes 1 loaf

Bread. What’s not to love? A crunchy crust and soft, airy interior are just the beginning of our obsession. We love this recipe because it packs a serious flavor profile with minimal effort. It’s great for beginners, and takes less than three hours from start to a tasty finish. A great recipe to inspire both novice and pro bakers alike!

Bread Ingredients:
1-1/2 teaspoon instant yeast
1-1/2 cups warm water (105° F)
1 teaspoon honey
1-1/2 teaspoon sea salt
2 tablespoons fresh rosemary, finely chopped
3 cups all purpose flour
1/2 teaspoon cornmeal
1 tablespoon olive oil, divided
1/2 teaspoon coarse/flaked sea salt

Roasted Garlic Ingredients:
1 head garlic
1 teaspoon olive oil

Directions:
1. Heat the oven to 400°F. Cut o the top of the garlic bulb to expose the cloves and place in a garlic roaster or a square of aluminum foil. Drizzle the garlic with the olive oil and cover. Or, in the case of foil, twist the corners at the top to prevent any oil drips during roasting. Roast for 30 minutes or until the cloves are soft and slightly browned. Remove from the oven and cool. Once cooled, use a small fork to remove the cloves from the head of garlic. Mash the soft cloves into a paste-like consistency.

2. Meanwhile, combine the yeast, water, and honey in a large mixing bowl. Let the mixture stand for about 5 minutes to allow the yeast to activate (the mixture should become slightly foamy.)

3. Add the mashed garlic, salt, and rosemary to the yeast mixture. Slowly add the flour to the mixing bowl in one cup increments, stirring with a wooden spoon until all the ingredients are incorporated. Do not over mix; the dough will be quite shaggy and sticky, yet will form a loose ball in the bowl.

4. Sprinkle the dough with a small amount of flour on top. Cover the bowl with a kitchen towel. Let the dough rise on the counter in a draft-free area for about 1 hour, or until it has roughly doubled in size.

5. On a lightly floured surface, with lightly floured hands, gently guide the dough into a ball. Place it back in the bowl, cover, and let the dough rise for another 30 minutes.

6. Preheat the oven to 450°F. Lightly coat the inside of an empty 5.5 qt. Dutch oven with 1/2 tablespoon of olive oil. Place the lid on the Dutch oven and put it in the middle of the oven. (Be sure to preheat the Dutch oven as the oven preheats; to avoid cracking of the pot’s enamel; never place a cold, empty Dutch oven in a hot oven.)

7. Lay a piece of parchment paper on the counter and sprinkle corn meal on the paper. Gently guide the risen dough out of the bowl and onto the parchment paper. Use the sides of the parchment paper to tip and coax the dough back into a circular form if it has lost its shape. Take care not to deflate the risen dough. Use oven mitts to remove the Dutch oven from the hot oven. Use the parchment paper to transfer the dough into the preheated Dutch oven. Brush the top with the olive oil. Use kitchen shears to cut an “X” on the top of the dough. Sprinkle the sea salt across the top.

8. Cover the bread with the Dutch oven lid. Use oven mitts to transfer the Dutch oven back into the oven. Bake for 30 minutes, until the bread is lightly browned. Remove the lid and cook for another 10 minutes, until the crust is nicely browned. The bread’s internal temperature should be between 195 - 210°F.

9. Cool on a cooling rack, then devour while warm, preferably with a healthy dose of butter and salt.

Sweet Potato Doughnut Holes

Lia Soneson

Did someone say fresh, warm, doughnut holes? IN THIS ISSUE, we feature doughnut making tips and techniques! We love making these bite-sized treats at home because we can enjoy them by the handful and not feel guilty in front of anyone. Now you can too!

Sweet Potato and Cardamom Doughnut Holes
Makes about 30 doughnut holes

Did someone say fresh, warm, doughnut holes? These lovely morsels feature warm, autumn spices including allspice, cinnamon, and cardamom. And, since they are made with sweet potatoes, they’re almost healthy, right? We love making these bite-sized treats at home because we can enjoy them by the handful and not feel guilty in front of anyone. Now you can too!

Ingredients:
2-1/2 cups all-purpose flour
1/4 cup sugar
1 tablespoon baking powder
1/4 teaspoon allspice
1/4 teaspoon cardamom
3/4 teaspoon salt
5 tablespoons chilled butter
3/4 cup buttermilk
1/2 cup sweet potato, cooked and pureed (roughly 1 small sweet potato)
1/2 teaspoon vanilla
4 cups canola oil for frying

Cinnamon Sugar Topping:
1/3 cup granulated sugar (or powdered sugar)
1 teaspoon cinnamon

Directions:
1. In a large bowl, combine the flour, sugar, baking powder, allspice, cardamom, and salt. Whisk the ingredients together until evenly incorporated. Cut the butter into the flour until it resembles a crumb-like mixture.

2. Add the buttermilk, mashed sweet potato, and vanilla, Fold the dough together until all the ingredients are combined. The dough will be sticky to the touch.

3. Scoop out pieces of the dough and roll them into balls roughly 1-1/2" in diameter. Set aside.

4. in a separate, shallow dish, stir together the cinnamon and sugar. Set aside.

5. Add the oil to a medium-sized saucepan and warm the oil over medium-high heat until it reaches 350°F. Drop the doughnut holes in about 6 at a time.

6. Fry the doughnut holes, very carefully, for about 3-4 minutes, occasionally turning them in the oil to ensure all sides are getting cooked and browning evenly.

7. Use a slotted spoon, skimmer, or spider to transfer the doughnut holes to a paper towel-lined plate. After cooling the doughnuts for about 30 seconds, roll them in the cinnamon-sugar mix until they are fully covered. Enjoy immediately!

Fresh Cream Puffs with Berry Filling

Lia Soneson

Cream_Puffs_v3_01.jpg

Expanding your repertoire of kitchen skills these days? Add cream puffs to your list of culinary mastery while celebrating the return of fresh berries. The light, delicate, cream puffs with sweet berry filling are perfect for Mother’s Day, too! This recipe starts with a classic French pâte à choux and finishes things off with bright, jammy berries, and homemade whipped cream.