Pizza is loved by everyone for a reason -- it’s so tasty! Try our recipe for an overnight pizza dough for the ultimate crispy, yet chewy thin-crust pizza experience. Practice patience as the dough rests, then enjoy how easily the final pizzas come together. Enjoy your handcrafted pizzas with our suggested toppings, or experiment with your own. It's a pizza party!
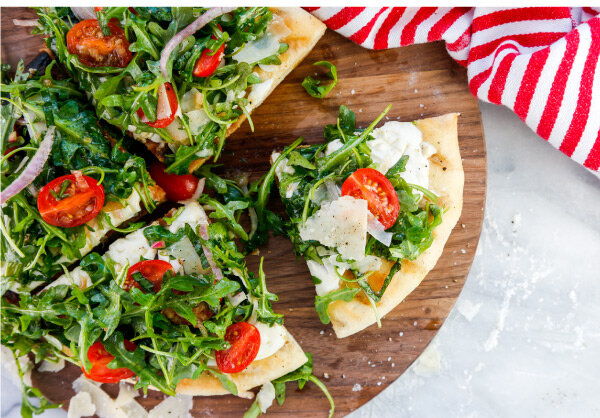
Thin Crust Pizza with Fresh Mozzarella, Chicken Sausage, Red Onion & Basil
Makes three 10-12" pizzas
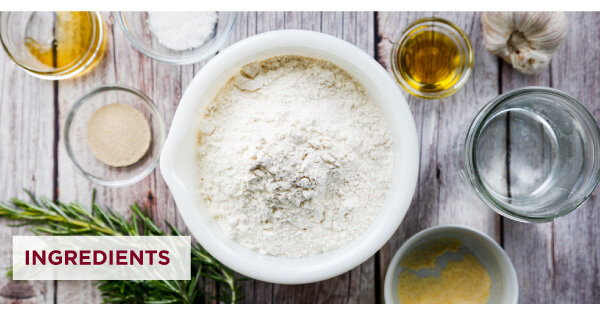
Dough Ingredients:
1-1/2 cups warm water - 110 degrees F
1 packet of active dry yeast
1 teaspoon sugar
3-1/2 - 4 cups all-purpose flour
1 teaspoon Kosher salt
2 tablespoons olive oil
Sauce Ingredients:
1 can (14.5 oz) whole San Marzano tomatoes
1 clove garlic
1/2 teaspoon Kosher salt
1/2 teaspoon sugar
1/4 teaspoon balsamic vinegar
Topping Ingredients:
Shredded Parmesan cheese
Fresh mozzarella, sliced
Spicy Italian chicken sausage, sliced
Red onion, thinly sliced
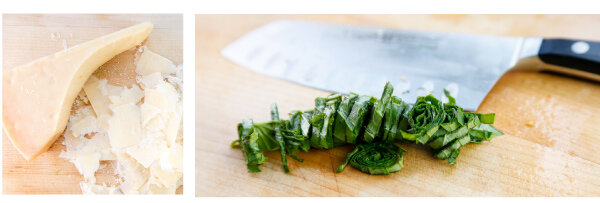
Basil, chiffonade cut as garnish
Directions:
1. Measure and heat the water to 110 degrees F. Add the water to the bowl of a stand mixer and add the sugar. Sprinkle the yeast on top. . Allow the yeast to stand undisturbed for a few minutes. It's ready to use when when it looks slightly foamy on top.
2. While the yeast is dissolving and activating, measure out the olive oil, salt, and flour.
3. Add the olive oil and salt to the yeast and water. Add one cup of the flour and mix on low for two minutes. Slowly, add 3 cups of flour and mix until a dough ball forms. Remove the dough from the mixer and knead a few times on a flour-dusted work surface. Form the dough into a ball.
4. Place the dough in a bowl coated with olive oil, and cover the dough ball with a kitchen towel. Let it double in size -- about 30 minutes.
5. Transfer the dough to a floured surface and divide it into three even pieces. Knead each section of dough individually, adding a little bit of additional flour to the dough and the working surface, as needed, until each dough ball is smooth, and not too sticky. Dust the dough balls with more flour, and place on a large plate under plastic wrap. Let the dough balls rest overnight in the refrigerator.
6. After the dough rests overnight, remove the plate from the fridge, and let the dough come to room temperature -- about two hours.
7. Place a pizza stone or baking steel on the middle oven rack and preheat the oven to 475-500 degrees F. Preheating the oven will ensure that the stone will be hot and ready when it's time for the pizzas to bake. A hot, preheated pizza stone produces a crispy bottom crust.
8. Prepare the sauce. In a blender or food processor, or directly in the tomato can using an immersion hand blender, combine all of the sauce ingredients and blend until smooth.
9. Prepare the pizza toppings. Slice the fresh mozzarella, the chicken sausage, red onions, and basil.
10. Once the oven is preheated, get ready to stretch and assemble the pizzas! Select one ball of dough. With floured hands begin to flatten the ball into a round disc, about 8”- 12" in diameter, starting from the center and working outward to form a round crust. The top of the dough ball will remain on top through this process. Try stretching the dough with the back of your hand, and avoid making holes.
11. Once the dough is formed, place it on a piece of parchment paper placed on top of the pizza peel for easy transferring to the pizza stone once assembled. Spread a thin layer of sauce to within about 1 inch from the edge. Add a layer of shredded parmesan cheese, then a layer of fresh mozzarella cheese. Finish the pizza with sliced chicken sausage and thinly sliced red onions. Avoid overloading the pizza with too many toppings.
12. After adding the toppings, transfer the pizza to the oven using a pizza peel.
13. Bake the pizza until the cheese melts and the crust is golden brown. Remove from the oven. Remember to allow the pizza to cool a little before eating. Garnish with fresh basil and enjoy!