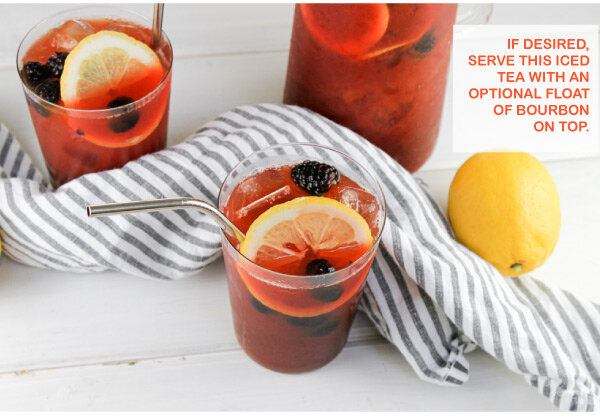
Blackberry & Lemon Iced Tea
Makes 8 cups iced tea
Nothing says summer like iced tea. We’ve decided to spruce up this favorite by adding fresh blackberries and slices of lemon to the tea we love so much. A great accompaniment to any al fresco meal.
Ingredients:
2 cups fresh blackberries, divided
1/4 cup sugar
8 cups water, divided
8 black tea bags
1 lemon, sliced
Directions:
1. Mash or puree 1 cup of blackberries with 1/4 cup sugar.
2. Bring 5 cups of water to a boil. Add the tea bags to the hot water and steep for 6-8 minutes, then remove the tea bags.
3. Pour the hot tea over the blackberry mixture and let sit for 1 hour. Then, strain through a fine mesh sieve.
4. Add 3 cups of cold water and taste the tea. Adjust the sweetness to your preference, then refrigerate for 2 hours or overnight. 5.
Serve on ice with a garnish of lemon wedges and remaining cup of whole blackberries.
6. Optionally, add a float of bourbon on top before serving.
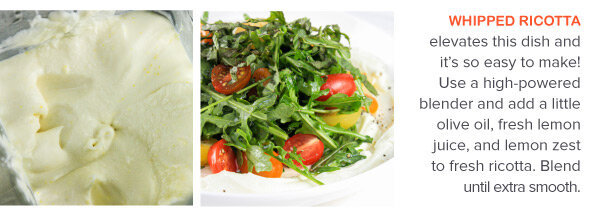
Arugula, Heirloom Tomato & Whipped Ricotta Salad
Serves 4 - 6
Whipped ricotta turns this salad into a creamy, dreamy delight! Spicy arugula complements the lemon-y, smooth whipped ricotta and the ripe grape tomatoes punctuate each bite with bursts of brightness. Salad
Ingredients:
15 oz fresh ricotta cheese
1 tablespoon olive oil
1 tablespoon fresh lemon juice
1 teaspoon lemon zest
1/4 teaspoon kosher salt
6 oz arugula
Heirloom cherry tomatoes
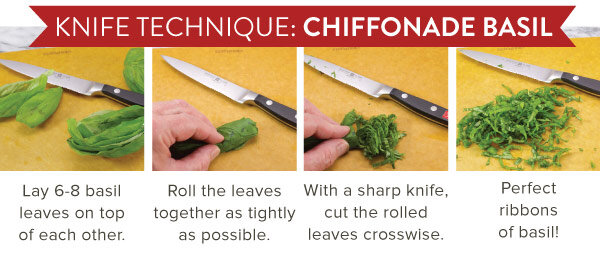
Basil, chiffonade cut for garnishing
Vinaigrette Ingredients:
3 tablespoons olive oil
1 tablespoon white wine vinegar
Juice of half a lemon
Salt and pepper
Directions:
1. In a food processor or high-powered blender, whip the ricotta with olive oil, fresh lemon juice, lemon zest, and salt until very smooth.
2. Whisk the vinaigrette ingredients together in a small jar.
3. Toss the arugula with the vinaigrette. Spread the ricotta on a large serving plate.
4. Top the ricotta layer with arugula, heirloom cherry tomatoes, and a garnish of basil.
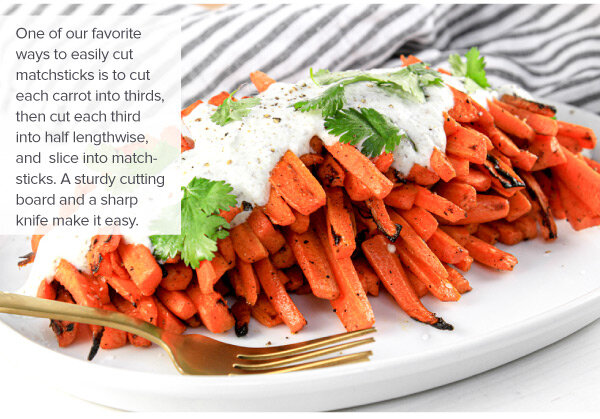
Grilled Carrots with Minted Yogurt Sauce
Serves 4 - 6
Carrots are transformed on the grill! With some simple seasonings and the utility of a grill basket, simple carrots become elevated into a flavorful, sweet, and savory side! Dressed up with an easy za’atar yogurt sauce, this side dish is worthy of repeating often.
Ingredients:
10 carrots, or about 2 lbs carrots, peeled and cut into 3” matchsticks
3 tablespoons olive oil
1/2 teaspoon garlic powder
1/2 teaspoon of Kosher salt
1/2 teaspoon freshly cracked black pepper
1 tablespoon sugar
Yogurt Sauce:
1 cup plain Greek yogurt
1 tablespoon fresh lemon juice (or about half of a small lemon)
1/2 teaspoon Kosher salt
1/2 teaspoon freshly ground black pepper
1 teaspoon Za’atar spice blend
Garnish:
Fresh cilantro leaves, coarsely chopped
Directions:
1. Peel the carrots, and cut into 3” long matchsticks.
2. Prepare the carrots for grilling: Place the carrots in a large bowl. Drizzle with olive oil and toss Sprinkle with garlic powder, Kosher salt, pepper, and sugar.
3. Grill the carrots in a grill basket over high heat until slightly blistered, a little charred, and just tender, stirring often.
4. While the carrots are grilling, prepare the yogurt sauce by whisking all of the yogurt sauce ingredients together. 5. Serve the grilled carrots with a drizzle of yogurt sauce, and a generous garnish of fresh cilantro.
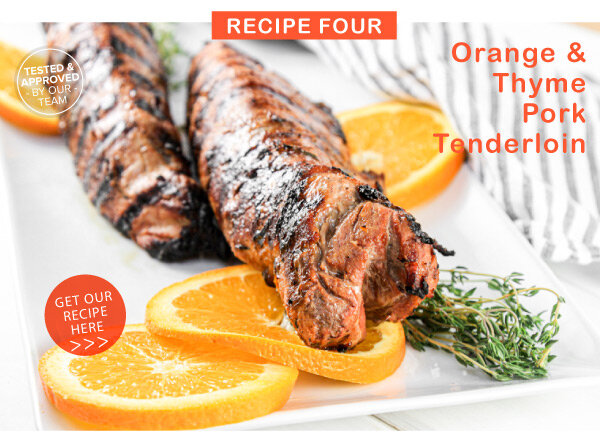
Orange & Thyme Pork Tenderloin
Serves 4 - 6
Pork tenderloins are perfectly primed for adapting to flavorful marinades. This marinade features fresh orange juice, thyme leaves and a few other classic marinade flavormakers like Dijon mustard, soy sauce, brown sugar, and garlic powder. It’s an easy and delicious recipe!
Ingredients:
2 pork tenderloins
Marinade:
1 tablespoon Dijon mustard
2 cloves garlic, minced
2 tablespoons brown sugar
2 tablespoons orange juice
3 tablespoons soy sauce
2 tablespoons olive oil
1/2 teaspoon Kosher salt
1/2 teaspoon freshly ground black pepper
1/2 teaspoon garlic powder
4 sprigs of thyme, leaves only
Directions:
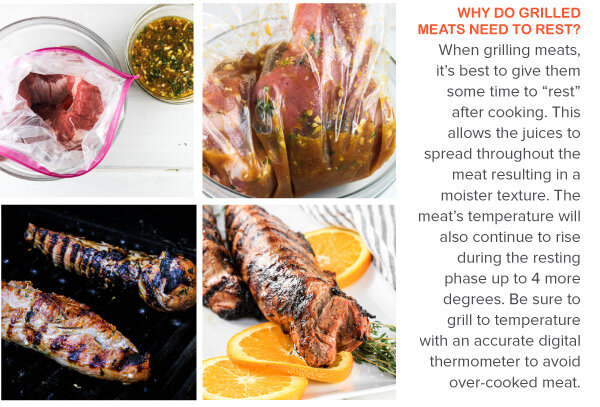
1. Prepare the marinade in a medium bowl by whisking all of the ingredients together.
2. Add the pork tenderloins to the marinade, cover, and refrigerate for at least one hour for the flavors to infuse into the meat.
3. Fire up the grill! Let the marinated tenderloins warm to room temperature for 20 minutes before grilling. Place the marinated tenderloins on the hot, well-oiled grill, and sear for 3-4 minutes on each side. Turn until all sides have seared and browned, and then, turn o one burner (or turn to low) to create a direct/indirect environment. Place the seared tenderloins on the cooler, indirect side, and continue to cook until their internal temperature reaches 145 degrees F.
4. Once the pork tenderloins reach 145 degrees F, place on a clean plate, and cover loosely with a tinfoil "tent" for about 10 minutes. This allows the meat to rest, and the juices to soak back into the meat. 5. Slice the grilled tenderloins, and serve warm.